Click on the Documents tab of your TabItem and use the Blend editor to open this control for editing. You should already have a default <Grid> control as the direct child of the TabItem control; however, change it to a StackPanel here using the Objects and Timeline window. This tab will display a FlowDocument that allows the user to highlight selected text, as well as add annotations using the Sticky Notes API.
Begin by defining the following ToolBar control, which has three simple (and unnamed!) Button controls. You will be rigging up a few new commands to these controls later on, so you do not need to refer to them in code:
<TabItem x:Name="tabDocuments" Header="Documents" VerticalAlignment="Bottom"
    Height="20">
    <StackPanel>
        <ToolBar>
            <Button BorderBrush="Green" Content="Add Sticky Note"/>
            <Button BorderBrush="Green" Content="Delete Sticky Notes"/>
            <Button BorderBrush="Green" Content="Highlight Text"/>
        </ToolBar>
    </StackPanel>
</TabItem>
Next, open the Assets Library and locate the FlowDocumentReader control from the All category of the Controls node. Place this control into your StackPanel, rename it to myDocumentReader, and stretch it out over the surface of your StackPanel (make sure you have clicked the Selection tool). At this point, your layout should look similar to what you see in Figure 28-40.
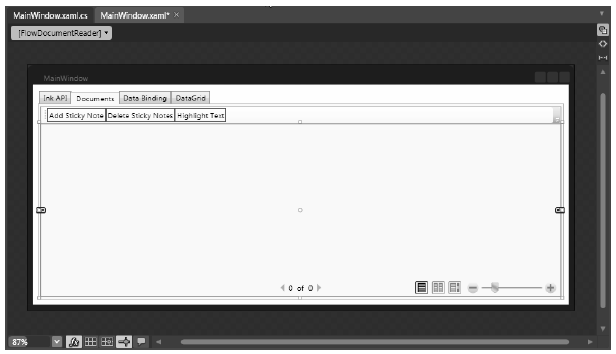
Figure 28-40 The layout of the Documents tab
Now select your FlowDocumentReader control in the Objects and Timeline editor and locate the Miscellaneous category of the Properties window. Next, click the New button next to the Document property. Doing this updates your XAML with an empty <FlowDocument>:
<FlowDocumentReader x:Name="myDocumentReader" Height="269.4">
    <FlowDocument/>
</FlowDocumentReader>
At this point, you can add document classes (e.g., List, Paragraph, Section, Table, LineBreak, Figure, Floater, and Span) to the element.
As soon as you add a new document to a document container, the Document property in the Properties window becomes expandable, displaying a ton of new properties that allow you to build the design of your document. For this example, the only property you care about is the Blocks (Collection) property (see Figure 28-41).
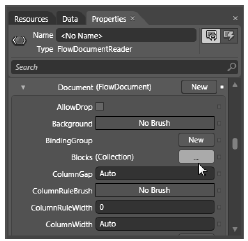
Figure 28-41 You can populate a FlowDocument using the Blocks (Collection) property
Click the ellipse button (...) to the right of Blocks (Collection), and then use the Add another item button of the resulting dialog box to insert a Section, List, and Paragraph. You can edit each one of these further using the Blocks editor; furthermore, a given block can contain related sub-blocks. For example, if you select your Section, you can add a Paragraph sub-block. In my case, I configured my Section with a specific background color, foreground color, and font size. I also inserted a sub- Paragraph.
Go ahead and configure your Section as you wish; however, leave the List and original Paragraph empty because you will drive these through code. Here is one possible way to configure the FlowDocument:
<FlowDocumentReader x:Name="myDocumentReader" Height="269.4">
    <FlowDocument>
        <Section Foreground = "Yellow" Background = "Black">
            <Paragraph FontSize = "20">
                Here are some fun facts about the WPF Document API!
            </Paragraph>
        </Section>
        <List/>
        <Paragraph/>
    </FlowDocument>
</FlowDocumentReader>
If you run your program now (hit the F5 key), you should already be able to zoom your document (using the lower-right slider bar), search for a keyword (using the lower-left search editor) and display the data in one of three manners (using the layout buttons). Figure 28-42 shows a search for the text WPF; note too that the content shown in this figure has been zoomed in on.
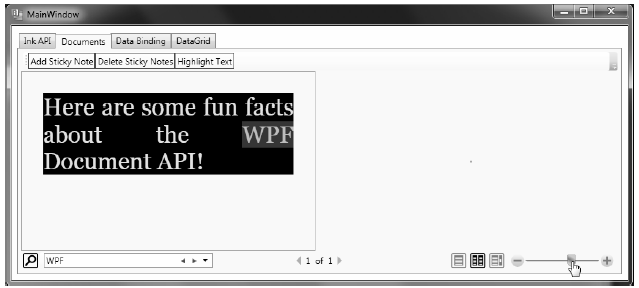
Figure 28-42 Manipulating the FlowDocument with the FlowDocumentReader
Before moving to the next step, you might want to edit your XAML to use a different FlowDocument container, such as the FlowDocumentScrollViewer or a RichTextBox, rather than the FlowDocumentReader. Once you done this, run the application again and notice the different ways the document data is handled. Be sure to roll back to the FlowDocumentReader type when you finish this task.
Now, let’s build the List block and the remaining Paragraph block in code. This is important because you might need to populate a FlowDocument based on user input, external files, database information, or what have you. Before you do so, use the XAML editor of Blend to give the List and Paragraph elements proper names, so you can access them in code:
<List x:Name="listOfFunFacts"/>
<Paragraph x:Name="paraBodyText"/>
In your code file, define a new private method named PopulateDocument(). This method first adds a set of new ListItems to the List, each of which has a Paragraph with a single Run. Also, your helper method dynamically builds a formatted paragraph using three separate Run objects, as in the following example:
private void PopulateDocument()
{
    // Add some data to the List item.
    this.listOfFunFacts.FontSize = 14;
    this.listOfFunFacts.MarkerStyle = TextMarkerStyle.Circle;
    this.listOfFunFacts.ListItems.Add(new ListItem( new
        Paragraph(new Run("Fixed documents are for WYSIWYG print ready docs!"))));
    this.listOfFunFacts.ListItems.Add(new ListItem(
        new Paragraph(new Run("The API supports tables and embedded figures!"))));
    this.listOfFunFacts.ListItems.Add(new ListItem(
        new Paragraph(new Run("Flow documents are read only!"))));
    this.listOfFunFacts.ListItems.Add(new ListItem(new Paragraph(new Run
        ("BlockUIContainer allows you to embed WPF controls in the document!")
        )));

    // Now add some data to the Paragraph.
    // First part of sentence.
    Run prefix = new Run("This paragraph was generated ");

    // Middle of paragraph.
    Bold b = new Bold();
    Run infix = new Run("dynamically");
    infix.Foreground = Brushes.Red;
    infix.FontSize = 30;
    b.Inlines.Add(infix);

    // Last part of paragraph.
    Run suffix = new Run(" at runtime!");

    // Now add each piece to the collection of inline elements
    // of the Paragraph.
    this.paraBodyText.Inlines.Add(prefix);
    this.paraBodyText.Inlines.Add(infix);
    this.paraBodyText.Inlines.Add(suffix);
}
Make sure you call this method from your window’s constructor. Once you do this, you can run the application and see your new, dynamically generated document content.
So far, so good. You can now build a document with interesting data using XAML and C# code; however, you still need to address the three buttons on your toolbar for the Documents tab. WPF ships with a set of commands that are used specifically with the Documents API. You can use these commands to allow the user to select a part of a document for highlighting or to add sticky note annotations. Best of all, you can add all of this with a few lines of code (and a tad of markup).
You can find the command objects for the Documents API bundled in the System.Windows.Annotations namespace of PresentationFramework.dll. Thus, you need to define a custom XML namespace in the opening element of the <Window> to use such objects in XAML (notice that the tag prefix is a):
<Window
...
    xmlns:a=
    "clr-namespace:System.Windows.Annotations;assembly=PresentationFramework"
    x:Class="WpfControlsAndAPIs.MainWindow"
    x:Name="Window"
    Title="MainWindow"
    Width="856" Height="383" mc:Ignorable="d"
    WindowStartupLocation="CenterScreen" >
...
</Window>
Now update your three <Button> definitions to set the Command property to three of the supplied annotation commands:
<ToolBar>
    <Button BorderBrush="Green" Content="Add Sticky Note"
        Command="a:AnnotationService.CreateTextStickyNoteCommand"/>
    <Button BorderBrush="Green" Content="Delete Sticky Notes"
        Command="a:AnnotationService.DeleteStickyNotesCommand"/>
    <Button BorderBrush="Green" Content="Highlight Text"
        Command="a:AnnotationService.CreateHighlightCommand"/>
</ToolBar>
The last thing you need to do is to enable annotation services for the FlowDocumentReader object, which you named myDocumentReader. Add another private method in your class named EnableAnnotations(), which is called from the constructor of the window. Now import the following namespaces:
using System.Windows.Annotations;
using System.Windows.Annotations.Storage;
Next, implement this method:
{
    // Create the AnnotationService object that works
    // with our FlowDocumentReader.
    AnnotationService anoService = new AnnotationService(myDocumentReader);

    // Create a MemoryStream which will hold the annotations.
    MemoryStream anoStream = new MemoryStream();

    // Now, create a XML-based store based on the MemoryStream.
    // You could use this object to programmatically add, delete
    // or find annotations.
    AnnotationStore store = new XmlStreamStore(anoStream);

    // Enable the annotation services.
    anoService.Enable(store);
}
The AnnotationService class allows a given document layout manger to opt in to annotation support. Before you call the Enable() method of this object, you need to provide a location for the object to store annotation data, which in this example is a chunk of memory represented by a MemoryStream object. Notice that you connect the AnnotationService object with the Stream using the AnnotationStore.
Now, run your application. When you select some text, you can click the Add Sticky Note button and type in some information. Also, when you select some text, you can highlight data (the color is yellow by default). Finally, you can delete created notes once you select them and click the Delete Sticky Note button. Figure 28-43 shows a test run.
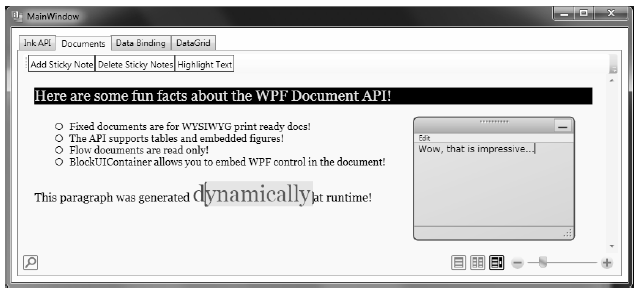
Figure 28-43 Sticky notes!
Let’s wrap up this look at the Documents API by looking at how simple it is to save a document out to a file, as well as read a document in from a file. Recall that, unless you wrap your FlowDocument object in a RichTextBox, the end user cannot edit the document; however, part of the document was created dynamically at runtime, so you might like to save it for later use. The ability to load an XPS style document could also be useful in many WPF applications because you might wish to define a blank document and load it all on the fly.
This next snippet assumes you will add two new Buttons to the Toolbar of the Documents tab, which you declare like this (note that you did not handle any events in your markup):
<Button x:Name="btnSaveDoc" HorizontalAlignment="Stretch"
    VerticalAlignment="Stretch" Width="75" Content="Save Doc"/>
<Button x:Name="btnLoadDoc" HorizontalAlignment="Stretch"
    VerticalAlignment="Stretch" Width="75" Content="Load Doc"/>
Now, in the constructor of your window, author the following lambda expressions to save and load the FlowDocument data (you’ll need to import the System.Windows.Markup namespace to gain access to the XamlReader and XamlWriter classes):
public MainWindow()
{
...
    // Rig up some Click handlers for the save / load of the flow doc.
    btnSaveDoc.Click += (o, s) =>
    {
        using(FileStream fStream = File.Open(
            "documentData.xaml", FileMode.Create))
        {
            XamlWriter.Save(this.myDocumentReader.Document, fStream);
        }
    };

    btnLoadDoc.Click += (o, s) =>
    {
        using(FileStream fStream = File.Open("documentData.xaml", FileMode.Open))
        {
            try
            {
                FlowDocument doc = XamlReader.Load(fStream) as FlowDocument;
                this.myDocumentReader.Document = doc;
            }
            catch(Exception ex) {MessageBox.Show(ex.Message, "Error Loading Doc!");}
        }
    };
}
That is all you need to do to save the document (note that you did not save any annotations; however, you can also accomplish that using annotation services). If you click your Save button, you will see a new *.xaml file in your \bin\Debug folder. This file contains the current document data.
That wraps up your look at the WPF Documents API. To be sure, there is more to this API than you have seen here; but at this point, you know a good deal about the basics. To wrap up this chapter, you will look at a handful of data-binding topics and complete the current application.